

Gmail Shortcuts Note: Must have "keyboard shortcuts" on in settings.
C: Compose new message.
Shift + C: Open new window to compose new message.
Slash (/): Switch focus to search box.
K: Switch focus to the next most recent email.
Enter or "O" opens focused email.
J: Switch focus to the next oldest email.
N: Switch focus to the next message in the "conversation."
Enter or "O" expands/collapses messages.
P: Switch focus to the previous message.
U: Takes you back to the inbox and checks for new mail.
Y: Various actions depending on current view: Has no effect in "Sent" and "All Mail" views. Inbox: Archive email or message.
Starred: Unstar email or message.
Spam: Unmark as spam and move back to "Inbox." Trash: Move back to "Inbox."
Any label: Remove the label.
X: "Check" an email.
Various actions can be performed against all checked emails.
S: "Star" an email.
Identical to the more familiar term, "flagging."
R: Reply to the email.
A: Reply to all recipients of the email.
F: Forward an email.
Shift + R: Reply to the email in a new window.
Shift + A: Reply to all recipients of the email in a new window.
Shift + F: Forward an email in a new window.
Shift + 1 (!): Mark an email as spam and remove it from the inbox.
G then I: Switch to "Inbox" view.
G then S: Switch to "Starred" view.
G then A: Switch to "All Mail" view.
G then C: Switch to "Contacts" view.
G then S: Switch to "Drafts" view.
Follow the given steps to configure your computer to reload previously opened folders automatically after shutdown.
To edit this feature, you will need to be logged into your computer with administrative rights.
First click on Start button then go to Control Panel.

Open the “Appearance and Themes” option in control panel then click on Folder Options.

A small windows dialog box will appear with the title “Folder options”, click on View tab.

This tip is very interesting for home and some small office users, who wants to restrict user's ability to shutdown their computer. You can hide the Shutdown button from the Start menu using registry editor and also restrict access to shutdown, if a user clicks on Ctrl+Alt+Del.
Follow the given steps to hide system shutdown button from start menu:
To use this feature, you will need to be logged into your computer with
administrative rights.
Click Start button and type regedit in Run option then press Enter for next.
Here locate the location to:
HKEY_CURRENT_USER\Software\Microsoft\Windows\CurrentVersion \Policies\Explorer
Here in right side panel, right click to create a new DWORD value with name NoClose.
Now assign number 1 to its value data box.
Now close the registry editor and restart your computer after any changes to go into effect.
But next time, if you want to unhide the shutdown button then simply change the value data box to 0 or delete this DWORD item.
Again close the registry editor and restart your computer after any changes to go into effect.
This basic and common way to dial the internet connection using giving path:
Click on Start Button > sittings then click on Network and dial-up connections option, here you can dial your internet connection.
Another way to dial your internet connection if you have a shortcut to your internet connection on your desktop. Simply boot your system and dial your internet connection from your desktop shortcut.
APPEND
(External)APPEND ;APPEND [d:]path[;][d:]path[...]APPEND [/X:onoff][/path:onoff] [/E]Displays or sets the search path for data files. DOS will search the specified path(s) if the file is not found in the current path.
ASSIGN
(External)ASSIGN x=y [...] /staRedirects disk drive requests to a different drive.
ATTRIB
(External)ATTRIB [d:][path]filename [/S]ATTRIB [+R-R] [+A-A] [+S-S] [+H-H] [d:][path]filename [/S]Sets or displays the read-only, archive, system, and hidden attributes of a file or directory.
BACKUP
(External)BACKUP d:[path][filename] d:[/S][/M][/A][/F:(size)] [/P][/D:date] [/T:time] [/L:[path]filename]Makes a backup copy of one or more files. (In DOS Version 6, this program is stored on the DOS supplemental disk.)
BREAK
(Internal)BREAK =onoffUsed from the DOS prompt or in a batch file or in the CONFIG.SYS file to set (or display) whether or not DOS should check for a Ctrl + Break key combination.
BUFFERS
(Internal)BUFFERS=(number),(read-ahead number)Used in the CONFIG.SYS file to set the number of disk buffers (number) that will be available for use during data input. Also used to set a value for the number of sectors to be read in advance (read-ahead) during data input operations.
CALL
(Internal)CALL [d:][path]batchfilename [options]Calls another batch file and then returns to current batch file to continue.
CHCP
(Internal)CHCP (codepage)Displays the current code page or changes the code page that DOS will use.
CHDIR
(Internal)CHDIR (CD) [d:]pathCHDIR (CD)[..]Displays working (current) directory and/or changes to a different directory.
CHKDSK
(External)CHKDSK [d:][path][filename] [/F][/V]Checks a disk and provides a file and memory status report.
CHOICE
(Internal)CHOICE [/C[:]keys] [/N][/S][/T[:]c,nn] [text]Used to provide a prompt so that a user can make a choice while a batch program is running.
CLS (Clear Screen)
(Internal)CLSClears (erases) the screen.
COMMAND
(External)COMMAND [d:][path] [device] [/P][/E:(size)] [/MSG][/Y [/C (command)/K (command)]Starts a new version of the DOS command processor (the program that loads the DOS Internal programs).
COMP
(External)COMP [d:][path][filename] [d:][path][filename] [/A][/C][/D][/L][/N:(number)]Compares two groups of files to find information that does not match. (See FC command).
COPY
(Internal)COPY [/Y-Y] [/A][/B] [d:][path]filename [/A][/B] [d:][path][filename] [/V]orCOPY [/Y-Y][/A][/B] [d:][path]filename+[d:][path]filename[...][d:][path][filename] [/V] Copies and appends files.
COUNTRY
(Internal)COUNTRY=country code,[code page][,][d:][filename]Used in the CONFIG.SYS file to tell DOS to use country-specific text conventions during processing.
CTTY
(Internal)CTTY (device)Changes the standard I/O (Input/Output) device to an auxiliary device.
DATE
(Internal)DATE mm-dd-yyDisplays and/or sets the system date.
DBLSPACE
(External)DBLSPACE / automount=drivesDBLSPACE /chkdsk [/F] [d:]DBLSPACE /compress d: [/newdrive=host:] [/reserve=size] [/F]DBLSPACE /create d: [/newdrive=host:] [/reserve=size] [/size=size]DBLSPACE /defragment [d:] ]/F]DBLSPACE /delete d:DBLSPACE /doubleguard=01DBLSPACE /format d:DBLSPACE [/info] [d:]DBLSPACE /listDBLSPACE /mount[=nnn] host: [/newdrive=d:]DBLSPACE /ratio[=ratio] [d:] [/all]DBLSPACE /size[=size] [/reserve=size] d:DBLSPACE /uncompress d: DBLSPACE /unmount [d:]A program available with DOS 6.0 that allows you to compress information on a disk.
DEBUG
(External)DEBUG [pathname] [parameters]An MS-DOS utility used to test and edit programs.
DEFRAG
(External)DEFRAG [d:] [/F][/S[:]order] [/B][/skiphigh [/LCD/BW/GO] [/H]DEFRAG [d:] [/V][/B][/skiphigh] [/LCD]/BW/GO] [/H]Optimizes disk performance by reorganizing the files on the disk.
DEL (ERASE)
(Internal)DEL (ERASE) [d:][path]filename [/P]Deletes (erases) files from disk.
DELOLDOS
(External)DELOLDOS [/B]Deletes all files from previous versions of DOS after a 5.0 or 6.0 installation.
DELTREE
(External)DELTREE [/Y] [d:]path [d:]path[...]Deletes (erases) a directory including all files and subdirectories that are in it.
DEVICE
(Internal)DEVICE=(driver name)Used in the CONFIG.SYS file to tell DOS which device driver to load.
DEVICEHIGH
(Internal)DEVICEHIGH=(driver name)Like DEVICE, DEVICEHIGH is used in the CONFIG.SYS file to tell DOS which device driver software to use for devices; however, this option is used to install the device driver into the upper memory area.
DIR
(Internal)DIR [d:][path][filename] [/A:(attributes)] [/O:(order)] [/B][/C][/CH][/L][/S][/P][/W] Displays directory of files and directories stored on disk.
DISKCOMP
(External)DISKCOMP [d:] [d:][/1][/8]Compares the contents of two diskettes.
DISKCOPY
(External)DISKCOPY [d:] [d:][/1][/V][/M]Makes an exact copy of a diskette.
DOS
(Internal)DOS=[highlow],[umbnoumb]Used in the CONFIG.SYS file to specify the memory location for DOS. It is used to load DOS into the upper memory area and to specify whether or not the upper memory blocks will be used.
DOSKEY
(External)DOSKEY [reinstall] [/bufsize=size][/macros][/history][/insert/overstrike] [macroname=[text]]Loads the Doskey program into memory which can be used to recall DOS commands so that you can edit them.
DOSSHELL
(External)DOSSHELL [/B] [/G:[resolution][n]][/T:[resolution][n]]Initiates the graphic shell program using the specified screen resolution.
DRIVPARM
(Internal)DRIVPARM= /D:(number) [/C] [/F:(form factor)] [/H:(number)] [/I][ /N][/S:(number)] [/T:(tracks)]Used in the CONFIG.SYS file to set parameters for a disk drive.
ECHO
(Internal)ECHO onoffECHO (message)Displays messages or turns on or off the display of commands in a batch file.
EDIT
(External)EDIT [d:][path]filename [/B][/G][/H][/NOHI]Starts the MS-DOS editor, a text editor used to create and edit ASCII text files.
EMM386
(External)EMM386 [onoffauto] [w=onoff]Enables or disables EMM386 expanded-memory support on a computer with an 80386 or higher processor.
EXE2BIN
(External)EXE2BIN [d:][path]filename [d:][path]filenameConverts .EXE (executable) files to binary format.
EXIT
(Internal)EXITExits a secondary command processor.
EXPAND
(External)EXPAND [d:][path]filename [[d:][path]filename[ . . .]]Expands a compressed file.
FASTHELP
(External)FASTHELP [command][command] /?Displays a list of DOS commands with a brief explanation of each.
FASTOPEN
(External)FASTOPEN d:[=n][/X]Keeps track of the locations of files for fast access.
FC
(External)FC [/A][/C][/L][/Lb n][/N][/T][/W][number] [d:][path]filename [d:][path]filenameor (for binary comparisons)FC [/B][/number] [d:][path]filename [d:][path]filenameDisplays the differences between two files or sets of files.
FCBS
(Internal)FCBS=(number)Used in the CONFIG.SYS file to specify the number of file-control blocks for file sharing.
FDISK
(External)FDISK [/status]Prepares a fixed disk to accept DOS files for storage.
FILES
(Internal)FILES=(number)Used in the CONFIG.Sys file to specify the maximum number of files that can be open at the same time.
FIND
(External)FIND [/V][/C][/I][/N] ÒstringÓ [d:][path]filename[...]Finds and reports the location of a specific string of text characters in one or more files.
FOR
(Internal)FOR %%(variable) IN (set) DO (command)or (for interactive processing)FOR %(variable) IN (set) DO (command)Performs repeated execution of commands (for both batch processing and interactive processing).
FORMAT
(External)FORMAT d:[/1][/4][/8][/F:(size)] [/N:(sectors)] [/T:(tracks)][/B/S][/C][/V:(label)] [/Q][/U][/V]Formats a disk to accept DOS files.
GOTO
(Internal)GOTO (label)Causes unconditional branch to the specified label.
GRAFTABL
(External)GRAFTABL [(code page)]GRAFTABL [status]Loads a table of character data into memory (for use with a color/graphics adapter).
GRAPHICS
(External)GRAPHICS [printer type][profile] [/B][/R][/LCD][/PB:(id)] [/C][/F][/P(port)]Provides a way to print contents of a graphics screen display.
HELP
(External)HELP [command] [/B][/G][/H][/NOHI]Displays information about a DOS command.
IF
(Internal)IF [NOT] EXIST filename (command) [parameters]IF [NOT] (string1)==(string2) (command) [parameters]IF [NOT] ERRORLEVEL (number) (command) [parameters]Allows for conditional operations in batch processing.
INCLUDE
(Internal)INCLUDE= blocknameUsed in the CONFIG.SYS file to allow you to use the commands from one CONFIG.SYS block within another.
INSTALL
(Internal)INSTALL=[d: ][\path]filename [parameters]Used in the CONFIG.SYS file to load memory-resident programs into conventional memory.
INTERLINK
(External)INTERLINK [client[:]=[server][:]]Connects two computers via parallel or serial ports so that the computers can share disks and printer ports.
INTERSVR
(External)INTERSVR [d:][...][/X=d:][...] [/LPT:[naddress]] [/COM:[naddress]][/baud:rate] [/B][/V]INTERSVR /RCOPYStarts the Interlink server.
JOIN
(External)JOIN d: [d:path]JOIN d: [/D]Allows access to the directory structure and files of a drive through a directory on a different drive.
KEYB
(External)KEYB [xx][,][yyy][,][d:][path]filename [/E][/ID:(number)] Loads a program that replaces the support program for U. S. keyboards.
LABEL
(External)LABEL [d:][volume label] Creates or changes or deletes a volume label for a disk.
LASTDRIVE
(Internal)LASTDRIVE=(drive letter)Used in the CONFIG.SYS file to set the maximum number of drives that can be accessed.
LOADFIX
(Internal)LOADFIX [d:][path]filename [parameters] Ensures that a program is loaded above the first 64K of conventional memory, and runs the program.
LOADHIGH
(Internal)LOADHIGH (LH) [d:][path]filename [parameters] Loads memory resident application into reserved area of memory (between 640K-1M).
MEM
(External)MEM [/program/debug/classify/free/module(name)] [/page] Displays amount of installed and available memory, including extended, expanded, and upper memory.
MEMMAKER
(External)MEMMAKER [/B][/batch][/session][/swap:d] [/T][/undo][/W:size1,size2] Starts the MemMaker program, a program that lets you optimize your computer's memory.
MENUCOLOR
(Internal)MENUCOLOR=textcolor,[background] Used in the CONFIG.SYS file to set the colors that will be used by DOS to display text on the screen.
MENUDEFAULT
(Internal)MENUDEFAULT=blockname, [timeout] Used in the CONFIG.SYS file to set the startup configuration that will be used by DOS if no key is pressed within the specified timeout period.
MENUITEM
(Internal)MENUITEM=blockname, [menutext] Used in the CONFIG.SYS file to create a start-up menu from which you can select a group of CONFIG.SYS commands to be processed upon reboot.
MIRROR
(External)MIRROR [d:]path [d:] path [...]MIRROR [d1:][d2:][...] [/T(drive)(files)] [/partn][/U][/1] Saves disk storage information that can be used to recover accidentally erased files.
MKDIR
(MD) (Internal)MKDIR (MD) [d:]pathCreates a new subdirectory.
MODE
(External)MODE nMODE LPT#[:][n][,][m][,][P][retry]MODE [n],m[,T]MODE (displaytype,linetotal)MODE COMn[:]baud[,][parity][,][databits][,][stopbits][,][retry]MODE LPT#[:]=COMn [retry]MODE CON[RATE=(number)][DELAY=(number)]MODE (device) CODEPAGE PREPARE=(codepage) [d:][path]filenameMODE (device) CODEPAGE PREPARE=(codepage list) [d:][path]filenameMODE (device) CODEPAGE SELECT=(codepage)MODE (device) CODEPAGE [/STATUS]MODE (device) CODEPAGE REFRESHSets mode of operation for devices or communications.
MORE
(External)MORE < (filename or command)(name)MORESends output to console, one screen at a time.
MOVE
(Internal)MOVE [/Y/-Y] [d:][path]filename[,[d:][path]filename[...]] destinationMoves one or more files to the location you specify. Can also be used to rename directories.
MSAV
(External)MSAV [d:] [/S/C][/R][/A][/L][/N][/P][/F][/video][/mouse]MSAV /videoScans your computer for known viruses.
MSBACKUP
(External)MSBACKUP [setupfile] [/BW/LCD/MDA] Used to backup or restore one or more files from one disk to another.
MSCDEX
(External)MSCDEX /D:driver [/D:driver2. . .] [/E][/K][/S][/V][/L:letter] [/M:number] Used to gain access to CD-ROM drives (new with DOS Version 6).
MSD
(External)MSD [/B][/I]MSD [/I] [/F[d:][path]filename [/P[d:][path]filename [/S[d:][path]filenameProvides detailed technical information about your computer.
NLSFUNC
(External)NLSFUNC [d:][path]filenameUsed to load a file with country-specific information.
NUMLOCK
(Internal)NUMLOCK=onoffUsed in the CONFIG.SYS file to specify the state of the NumLock key.
PATH
(Internal)PATH;PATH [d:]path[;][d:]path[...] Sets or displays directories that will be searched for programs not in the current directory.
PAUSE
(Internal)PAUSE [comment] Suspends execution of a batch file until a key is pressed.
POWER
(External)POWER [adv:maxregmin]stdoff] Used to turn power management on and off, report the status of power management, and set levels of power conservation.
PRINT
(External)PRINT [/B:(buffersize)] [/D:(device)] [/M:(maxtick)] [/Q:(value] [/S:(timeslice)][/U:(busytick)] [/C][/P][/T] [d:][path][filename] [...] Queues and prints data files.
PROMPT
(Internal)PROMPT [prompt text] [options] Changes the DOS command prompt.
RECOVER
(External)RECOVER [d:][path]filenameRECOVER d:Resolves sector problems on a file or a disk. (Beginning with DOS Version 6, RECOVER is no longer available ).
REM
(Internal)REM [comment] Used in batch files and in the CONFIG.SYS file to insert remarks (that will not be acted on).
RENAME (REN)
(Internal)RENAME (REN) [d:][path]filename [d:][path]filename Changes the filename under which a file is stored.
REPLACE
(External)REPLACE [d:][path]filename [d:][path] [/A][/P][/R][/S][/U][/W] Replaces stored files with files of the same name from a different storage location.
RESTORE
(External)RESTORE d: [d:][path]filename [/P][/S][/B:mm-dd-yy] [/A:mm-dd-yy][/E:hh:mm:ss] [/L:hh:mm:ss] [/M][/N][/D] Restores to standard disk storage format files previously stored using the BACKUP command.
RMDIR (RD)
(Internal)RMDIR (RD) [d:]pathRemoves a subdirectory.
SCANDISK
(External)SCANDISK [d: [d: . . .]/all][/checkonly/autofix[/nosave]/custom][/surface][/mono][/nosummay]SCANDISK volume-name[/checkonly/autofix[/nosave]/custom][/mono][/nosummary]SCANDISK /fragment [d:][path]filenameSCANDISK /undo [undo-d:][/mono] Starts the Microsoft ScanDisk program which is a disk analysis and repair tool used to check a drive for errors and correct any problems that it finds.
SELECT
(External)SELECT [d:] [d:][path] [country code][keyboard code] Formats a disk and installs country-specific information and keyboard codes (starting with DOS Version 6, this command is no longer available).
SET
(Internal)SET (string1)=(string2)Inserts strings into the command environment. The set values can be used later by programs.
SETVER
(External)SETVER [d:]:path][filename (number)][/delete][/quiet] Displays the version table and sets the version of DOS that is reported to programs.
SHARE
(External)SHARE [/F:space] [/L:locks] Installs support for file sharing and file locking.
SHELL
(Internal)SHELL=[d:][path]filename [parameters] Used in the CONFIG.SYS file to specify the command interpreter that DOS should use.
SHIFT
(Internal)SHIFTIncreases number of replaceable parameters to more than the standard ten for use in batch files.
SORT
(External)SORT [/R][/+n] < (filename)SORT [/R][/+n] > (filename2)Sorts input and sends it to the screen or to a file.
STACKS
(Internal)STACKS=(number),(size)Used in the CONFIG.SYS file to set the number of stack frames and the size of each stack frame.
SUBMENU
(Internal)SUBMENU=blockname, [menutext] Used in the CONFIG.SYS file to create a multilevel menu from which you can select start-up options.
SUBST
(External)SUBST d: d:pathSUBST d: /DSubstitutes a virtual drive letter for a path designation.
SWITCHES
(Internal)SWITCHES= [/K][/F][/N][/W] Used in the CONFIG.SYS file to configure DOS in a special way; for example, to tell DOS to emulate different hardware configurations.
SYS
(External)SYS [source] d:Transfers the operating system files to another disk.
TIME
(Internal)TIME hh:mm[:ss][.cc][AP] Displays current time setting of system clock and provides a way for you to reset the time.
TREE
(External)TREE [d:][path] [/A][/F] Displays directory paths and (optionally) files in each subdirectory.
TYPE
(Internal)TYPE [d:][path]filenameDisplays the contents of a file.
UNDELETE
(External)UNDELETE [d:][path][filename] [/DT/DS/DOS]UNDELETE [/list/all/purge[d:]/status/load/U/S[d:]/Td:[-entries]] Restores files deleted with the DELETE command.
UNFORMAT
(External)UNFORMAT d: [/J][/L][/test][/partn][/P][/U] Used to undo the effects of formatting a disk.
VER
(Internal)VERDisplays the DOS version number.
VERIFY
(Internal)VERIFY onoffTurns on the verify mode; the program checks all copying operations to assure that files are copied correctly.
VOL
(Internal)VOL [d:] Displays a disk's volume label.
VSAFE
(External)VSAFE [/option[+-]...] [/NE][/NX][Ax/Cx] [/N][/D][/U] VSAFE is a memory-resident program that continuously monitors your computer for viruses and displays a warning when it finds one.
XCOPY
(External)XCOPY [d:][path]filename [d:][path][filename] [/A][/D:(date)] [/E][/M][/P][/S][/V][/W][Y\-Y]Copies directories, subdirectories, and files.
Syntax Notes
To be functional, each DOS command must be entered in a particular way: this command entry structure is known as the command's "syntax." The syntax "notation" is a way to reproduce the command syntax in print. For example, you can determine the items that are optional, by looking for information that is printed inside square brackets. The notation [d:], for example, indicates an optional drive designation. The command syntax, on the other hand, is how YOU enter the command to make it work.
Command Syntax Elements
1. Command NameThe DOS command name is the name you enter to start the DOS program (a few of the DOS commands can be entered using shortcut names). The DOS command name is always entered first. In this book, the command is usually printed in uppercase letters, but you can enter command names as either lowercase or uppercase or a mix of both. 2. SpaceAlways leave a space after the command name.3. Drive DesignationThe drive designation (abbreviated in this book as "d:") is an option for many DOS commands. However, some commands are not related to disk drives and therefore do not require a drive designation. Whenever you enter a DOS command that deals with disk drives and you are already working in the drive in question, you do not have to enter the drive designator. For example, if you are working in drive A (when the DOS prompt A> is showing at the left side of the screen) and you want to use the DIR command to display a directory listing of that same drive, you do not have to enter the drive designation. If you do not enter a drive designation, DOS always assumes you are referring to the drive you are currently working in (sometimes called the "default" drive). 4. A ColonWhen referring to a drive in a DOS command, you must always follow the drive designator with a colon (:) (this is how DOS recognizes it as a drive designation).5. PathnameA pathname (path) refers to the path you want DOS to follow in order to act on the DOS command. As described in Chapter 3, it indicates the path from the current directory or subdirectory to the files that are to be acted upon.6. FilenameA filename is the name of a file stored on disk. As described in Chapter 1, a filename can be of eight or fewer letters or other legal characters. 7. Filename ExtensionA filename extension can follow the filename to further identify it. The extension follows a period and can be of three or fewer characters. A filename extension is not required.8. SwitchesCharacters shown in a command syntax that are represented by a letter or number and preceded by a forward slash (for example, "/P") are command options (sometimes known as "switches"). Use of these options activate special operations as part of a DOS command's functions.9. BracketsItems enclosed in square brackets are optional; in other words, the command will work in its basic form without entering the information contained inside the brackets.10. EllipsesEllipses (...) indicate that an item in a command syntax can be repeated as many times as needed.11. Vertical BarWhen items are separated by a vertical bar (), it means that you enter one of the separated items. For example: ON OFF means that you can enter either ON or OFF, but not both
Run Commands In Windows XPYou can access all these programs by going through START/RUN or Simply Click Windows Key+R* SQL Client Configuration - cliconfg* System Configuration Editor - sysedit* System Configuration Utility - msconfig* System File Checker Utility (Scan Immediately)- sfc /scannow* System File Checker Utility (Scan Once At Next Boot)- sfc /scanonce* System File Checker Utility (Scan On Every Boot) - sfc /scanboot* System File Checker Utility (Return to Default Setting)- sfc /revert* System File Checker Utility (Purge File Cache)- sfc /purgecache* System File Checker Utility (Set Cache Size to size x)-sfc/cachesize=x* System Information - msinfo32.* Task Manager – taskmgr* System Properties - sysdm.cpl* Task Manager – taskmgr* TCP Tester - tcptest* Telnet Client - telnet* Tweak UI (if installed) - tweakui* User Account Management- nusrmgr.cpl* Utility Manager - utilman* Windows Address Book - wab* Windows Address Book Import Utility - wabmig* Windows Backup Utility (if installed)- ntbackup* Windows Explorer - explorer* Windows Firewall- firewall.cpl* Windows Magnifier- magnify* Windows Management Infrastructure - wmimgmt.msc* Windows Media Player - wmplayer* Windows Messenger - msmsgs* Windows Picture Import Wizard (need camera connected)- wiaacmgr* Windows System Security Tool – syskey* Windows Update Launches - wupdmgr* Windows Version (to show which version of windows)- winver* Windows XP Tour Wizard - tourstart* Wordpad - write* Password Properties - password.cpl* Performance Monitor - perfmon.msc* Phone and Modem Options - telephon.cpl* Phone Dialer - dialer* Pinball Game - pinball* Power Configuration - powercfg.cpl* Printers and Faxes - control printers* Printers Folder – printers* Private Character Editor - eudcedit* Quicktime (If Installed)- QuickTime.cpl* Real Player (if installed)- realplay* Regional Settings - intl.cpl* Registry Editor - regedit* Registry Editor - regedit32* Remote Access Phonebook - rasphone* Remote Desktop - mstsc* Removable Storage - ntmsmgr.msc* Removable Storage Operator Requests - ntmsoprq.msc* Resultant Set of Policy (XP Prof) - rsop.msc* Scanners and Cameras - sticpl.cpl* Scheduled Tasks - control schedtasks* Security Center - wscui.cpl* Services - services.msc* Shared Folders - fsmgmt.msc* Shuts Down Windows - shutdown* Sounds and Audio - mmsys.cpl* Spider Solitare Card Game - spider* Malicious Software Removal Tool - mrt* Microsoft Access (if installed) - access.cpl* Microsoft Chat - winchat* Microsoft Excel (if installed) - excel* Microsoft Frontpage (if installed)- frontpg* Microsoft Movie Maker - moviemk* Microsoft Paint - mspaint* Microsoft Powerpoint (if installed)- powerpnt* Microsoft Word (if installed)- winword* Microsoft Syncronization Tool - mobsync* Minesweeper Game - winmine* Mouse Properties - control mouse* Mouse Properties - main.cpl* Nero (if installed)- nero* Netmeeting - conf* Network Connections - control netconnections* Network Connections - ncpa.cpl* Network Setup Wizard - netsetup.cpl* Notepad - notepad* Nview Desktop Manager (If Installed)- nvtuicpl.cpl* Object Packager - packager* ODBC Data Source Administrator- odbccp32.cpl* On Screen Keyboard - osk* Opens AC3 Filter (If Installed) - ac3filter.cpl* Outlook Express - msimn* Paint – pbrush* Keyboard Properties - control keyboard* IP Configuration (Display Connection Configuration) - ipconfi/all* IP Configuration (Display DNS Cache Contents)- ipconfig /displaydns* IP Configuration (Delete DNS Cache Contents)- ipconfig /flushdns* IP Configuration (Release All Connections)- ipconfig /release* IP Configuration (Renew All Connections)- ipconfig /renew* IP Configuration(RefreshesDHCP&Re-RegistersDNS)-ipconfig/registerdns* IP Configuration (Display DHCP Class ID)- ipconfig/showclassid* IP Configuration (Modifies DHCP Class ID)- ipconfig /setclassid* Java Control Panel (If Installed)- jpicpl32.cpl* Java Control Panel (If Installed)- javaws* Local Security Settings - secpol.msc* Local Users and Groups - lusrmgr.msc* Logs You Out Of Windows - logoff.....* Accessibility Controls - access.cpl* Accessibility Wizard - accwiz* Add Hardware - Wizardhdwwiz.cpl* Add/Remove Programs - appwiz.cpl* Administrative Tools control - admintools* Adobe Acrobat (if installed) - acrobat* Adobe Designer (if installed)- acrodist* Adobe Distiller (if installed)- acrodist* Adobe ImageReady (if installed)- imageready* Adobe Photoshop (if installed)- photoshop* Automatic Updates - wuaucpl.cpl* Bluetooth Transfer Wizard – fsquirt* Calculator - calc* Certificate Manager - certmgr.msc* Character Map - charmap* Check Disk Utility - chkdsk* Clipboard Viewer - clipbrd* Command Prompt - cmd* Component Services - dcomcnfg* Computer Management - compmgmt.msc* Control Panel - control* Date and Time Properties - timedate.cpl* DDE Shares - ddeshare* Device Manager - devmgmt.msc* Direct X Control Panel (If Installed)- directx.cpl* Direct X Troubleshooter- dxdiag* Disk Cleanup Utility- cleanmgr* Disk Defragment- dfrg.msc* Disk Management- diskmgmt.msc* Disk Partition Manager- diskpart* Display Properties- control desktop* Display Properties- desk.cpl* Display Properties (w/Appearance Tab Preselected)- control color* Dr. Watson System Troubleshooting Utility- drwtsn32* Driver Verifier Utility- verifier* Event Viewer- eventvwr.msc* Files and Settings Transfer Tool- migwiz* File Signature Verification Tool- sigverif* Findfast- findfast.cpl* Firefox (if installed)- firefox* Folders Properties- control folders* Fonts- control fonts* Fonts Folder- fonts* Free Cell Card Game- freecell* Game Controllers- joy.cpl* Group Policy Editor (XP Prof)- gpedit.msc* Hearts Card Game- mshearts* Help and Support- helpctr* HyperTerminal- hypertrm* Iexpress Wizard- iexpress* Indexing Service- ciadv.msc* Internet Connection Wizard- icwconn1* Internet Explorer- iexplore* Internet Setup Wizard- inetwiz* Internet Properties- inetcpl.cpl
Single Click Shutdown Did you know that in Windows XP you can shut down your computer from the (eventually DOS prompt) command line box? Moreover, you can do this by clicking your mouse only once.All you need to do is... right-click on an empty Desktop spot -> select New -> Shortcut -> type shutdown followed by a space, and then enter one or more of the parameters listed below -> click Next -> type a suggestive name for your new shortcut -> finally, click Finish.
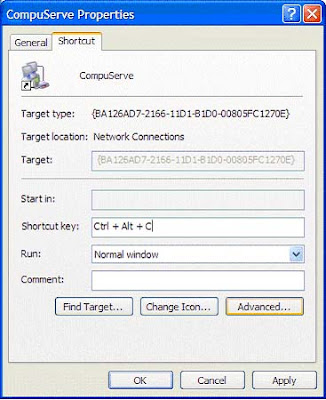
This is the Shutdown.exe (located in %systemroot%\System32, usually C:\Windows\System32) syntax:shutdown [-i-l-s-r-a] [-f] [-m \\computername] [-t xx] [-c "Text"] [-d[u][p]:xx:yy]Valid command line switches:-a = Abort system shutdown in progress ONLY IF the -t xx timeout option was already set to ANY value other than 0. ALL switches except -l and -m are ignored during abort.-c "Text" = Text comment (case insensitive) to be displayed in the Message area of the System Shutdown window. MUST be enclosed between quotes. Maximum allowed 127 ASCII characters.-d [u][p]:xx:yy = Reason code for shutdown:u = User code.p = Planned shutdown code.xx = Major reason code. Positive integer number less than 256.yy = Minor reason code. Positive integer number less than 65536.-f = Force running applications to close without warning.-i = Display the shutdown interface (GUI). MUST be the first option!-l = Log off the current user of the local computer (default action). Can NOT be used with the -m option unless the current user has Sysadmin rights, in which case the -m switch takes precedence.-m \\computername = Remote/network computer name (most always case sensitive) to log off/restart/shut down. Current user MUST have Sysadmin rights to be allowed to use this switch!-s = Shut down the local computer.-r = Shut down and restart (reboot) the local computer.-t xx = Set shutdown timer to timeout for xx seconds. IF NOT specified defaults to 20 seconds. Allowed values between 0 and 99 seconds. The -a switch is the ONLY one that CAN be used during the timeout period.NOTES:The dash (-) in front of these switches can be replaced by a forward slash (/).Spaces are NOT required to separate the shutdown command from ANY following switches, but ARE required to separate ANY switch from its following parameter(s), if any.For example:shutdown -s -c "Shutting down!" -t 3tells your computer to shutdown after waiting for 3 seconds while the System Shutdown window will display text above in the Message area.Optional: after you're done creating your customized shortcut for shutdown -> right-click on it -> select Properties -> enter your desired key "combo" in the Shortcut Key box (e.g. Ctrl + Alt + End) -> click OK/Apply.From now on just left-click on your shutdown shortcut or hit that key combination to turn off/restart/log off your computer
Windows Shortcuts
Shift + F10 right-clicks. Win + L (XP Only): Locks keyboard. Similar to Lock Workstation.
Win + F or F3: Open Find dialog.
(All Files) F3 may not work in some applications which use F3 for their own find dialogs. Win + Control + F: Open Find dialog.
(Computers) Win + U: Open Utility Manager.
Win + F1: Open Windows help.
Win + Pause: Open System Properties dialog.
Win + Tab: Cycle through taskbar buttons.
Enter clicks, AppsKey or Shift + F10 right-clicks.
Win + Shift + Tab: Cycle through taskbar buttons in reverse.
Alt + Tab: Display Cool Switch.
More commonly known as the AltTab dialog.
Alt + Shift + Tab: Display Cool Switch; go in reverse.
Alt + Escape: Send active window to the bottom of the z-order.
Alt + Shift + Escape: Activate the window at the bottom of the z-order.
Alt + F4: Close active window; or, if all windows are closed, open shutdown dialog.
Shift while a CD is loading: Bypass AutoPlay. Shift while login: Bypass startup folder.
Only those applications will be ignored which are in the startup folder, not those started from the registry (Microsoft\Windows\CurrentVersion\Run\) Ctrl + Alt + Delete or Ctrl + Alt + NumpadDel (Both NumLock states): Invoke the Task Manager or NT Security dialog.
Ctrl + Shift + Escape (2000/XP ) or (Ctrl + Alt + NumpadDot) : Invoke the task manager.
On earlier OSes, acts like Ctrl + Escape.
Print screen: Copy screenshot of current screen to clipboard.
Alt + Print screen: Copy screenshot of current active window to clipboard.
Ctrl + Alt + Down Arrow: Invert screen. Untested on OS's other than XP.
Ctrl + Alt + Up Arrow: Undo inversion.
Win + B : Move focus to systray icons.
General Ctrl + C or Ctrl + Insert: Copy.
Ctrl + X or Shift + Delete: Cut.
Ctrl + V or Shift + Insert: Paste/Move.
Ctrl + N: New... File, Tab, Entry, etc.
Ctrl + S: Save. Ctrl + O: Open... Ctrl + P: Print.
Ctrl + Z: Undo.
Ctrl + A: Select all.
Ctrl + F: Find... Ctrl+W : to close the current window Ctrl + F4: Close tab or child window.
F1: Open help.
F11: Toggle full screen mode.
Alt or F10: Activate menu bar.
Alt + Space: Display system menu.
Same as clicking the icon on the titlebar.
Escape: Remove focus from current control/menu, or close dialog box.
General Navigation Tab: Forward one item.
Shift + Tab: Backward one item.
Ctrl + Tab: Cycle through tabs/child windows.
Ctrl + Shift + Tab: Cycle backwards through tabs/child windows.
Enter: If a button's selected, click it, otherwise, click default button.
Space: Toggle items such as radio buttons or checkboxes.
Alt + (Letter): Activate item corresponding to (Letter).
(Letter) is the underlined letter on the item's name.
Ctrl + Left: Move cursor to the beginning of previous word.
Ctrl + Right: Move cursor to the beginning of next word.
Ctrl + Up: Move cursor to beginning of previous paragraph.
This and all subsequent Up/Down hotkeys in this section have only been known to work in Rich Edit controls.
Ctrl + Down: Move cursor to beginning of next paragraph.
Shift + Left: Highlight one character to the left.
Shift + Right: Highlight one character to the right.
Shift + Up: Highlight from current cursor position, to one line up.
Shift + Down: Highlight from current cursor position, to one line down.
Ctrl + Shift + Left: Highlight to beginning of previous word.
Ctrl + Shift + Right: Highlight to beginning of next word.
Ctrl + Shift + Up: Highlight to beginning of previous paragraph.
Ctrl + Shift + Down: Highlight to beginning of next paragraph.
Home: Move cursor to top of a scrollable control.
End: Move cursor to bottom of a scrollable control.
File Browser Arrow Keys: Navigate.
Shift + Arrow Keys: Select multiple items.
Ctrl + Arrow Keys: Change focus without changing selection. "Focus" is the object that will run on Enter.
Space toggles selection of the focused item.
(Letter): Select first found item that begins with (Letter).
BackSpace: Go up one level to the parent directory.
Alt + Left: Go back one folder. Alt + Right: Go forward one folder.
Enter: Activate (Double-click) selected item(s).
Alt + Enter: View properties for selected item.
F2: Rename selected item(s). Ctrl + NumpadPlus: In a Details view, resizes all columns to fit the longest item in each one. Delete: Delete selected item(s).
Shift + Delete: Delete selected item(s); bypass Recycle Bin. Ctrl while dragging item(s): Copy. Ctrl + Shift while dragging item(s): Create shortcut(s).
In tree pane, if any: Left: Collapse the current selection if expanded, or select the parent folder. Right: Expand the current selection if collapsed, or select the first subfolder.
Numpad Asterisk: Expand currently selected directory and all subdirectories.
No undo. Numpad Plus: Expand currently selected directory.
Numpad Minus: Collapse currently selected directory.
Accessibility Right Shift for eight seconds: Toggle FilterKeys on and off. FilterKeys must be enabled.
Left Alt + Left Shift + PrintScreen: Toggle High Contrast on and off.
High Contrast must be enabled.
Left Alt + Left Shift + NumLock: Toggle MouseKeys on and off.
MouseKeys must be enabled.
NumLock for five seconds: Toggle ToggleKeys on and off.
ToggleKeys must be enabled. Shift five times: Toggle StickyKeys on and off.
StickyKeys must be enabled. 6.) Microsoft Natural Keyboard with IntelliType Software Installed Win + L: Log off Windows. Win + P: Open Print Manager.
Win + C: Open control panel. Win + V: Open clipboard.
Win + K: Open keyboard properties. Win + I: Open mouse properties.
Win + A: Open Accessibility properties.
Win + Space: Displays the list of Microsoft IntelliType shortcut keys.
Win + S: Toggle CapsLock on and off.
Remote Desktop Connection Navigation
Ctrl + Alt + End: Open the NT Security dialog.
Alt + PageUp: Switch between programs.
Alt + PageDown: Switch between programs in reverse.
Alt + Insert: Cycle through the programs in most recently used order.
Alt + Home: Display start menu.
Ctrl + Alt + Break: Switch the client computer between a window and a full screen.
Alt + Delete: Display the Windows menu.
Ctrl + Alt + NumpadMinus: Place a snapshot of the entire client window area on the Terminal server clipboard and provide the same functionality as pressing Alt + PrintScreen on a local computer.
Ctrl + Alt + NumpadPlus: Place a snapshot of the active window in the client on the Terminal server clipboard and provide the same functionality as pressing PrintScreen on a local computer.
Mozilla Firefox Shortcuts Ctrl + Tab or Ctrl + PageDown: Cycle through tabs.
Ctrl + Shift + Tab or Ctrl + PageUp: Cycle through tabs in reverse.
Ctrl + (1-9): Switch to tab corresponding to number.
Ctrl + N: New window. Ctrl + T: New tab.
Ctrl + L or Alt + D or F6: Switch focus to location bar.
Ctrl + Enter: Open location in new tab. Shift + Enter: Open location in new window.
Ctrl + K or Ctrl + E: Switch focus to search bar.
Ctrl + O: Open a local file. Ctrl + W: Close tab, or window if there's only one tab open.
Ctrl + Shift + W: Close window.
Ctrl + S: Save page as a local file. Ctrl + P: Print page.
Ctrl + F or F3: Open find toolbar.
Ctrl + G or F3: Find next... Ctrl + Shift + G or Shift + F3: Find previous... Ctrl + B or Ctrl + I: Open Bookmarks sidebar.
Ctrl + H: Open History sidebar.
Escape: Stop loading page.
Ctrl + R or F5: Reload current page.
Ctrl + Shift + R or Ctrl + F5: Reload current page; bypass cache.
Ctrl + U: View page source. Ctrl + D: Bookmark current page.
Ctrl + NumpadPlus or Ctrl + Equals (+/=): Increase text size.
Ctrl + NumpadMinus or Ctrl + Minus: Decrease text size.
Ctrl + Numpad0 or Ctrl + 0: Set text size to default.
Alt + Left or Backspace: Back.
Alt + Right or Shift + Backspace: Forward. Alt + Home: Open home page.
Ctrl + M: Open new message in integrated mail client.
Ctrl + J: Open Downloads dialog.
F6: Switch to next frame.
You must have selected something on the page already, e.g. by use of Tab.
Shift + F6: Switch to previous frame.
Apostrophe ('): Find link as you type. Slash (/): Find text as you type.
List of F1-F9 Key Commands for the Command Prompt
F1 / right arrow: Repeats the letters of the last command line, one by one.
F2: Displays a dialog asking user to "enter the char to copy up to" of the last command line
F3: Repeats the last command line
F4: Displays a dialog asking user to "enter the char to delete up to" of the last command line
F5: Goes back one command line
F6: Enters the traditional CTRL+Z (^z)
F7: Displays a menu with the command line history
F8: Cycles back through previous command lines (beginning with most recent)
F9: Displays a dialog asking user to enter a command number, where 0 is for first command line entered.
Alt+Enter: toggle full Screen mode. up/down: scroll thru/repeat previous entries Esc: delete line Note: The buffer allows a maximum of 50 command lines. After this number is reached, the first line will be replaced in sequence. Helpful accessibility keyboard shortcuts Switch FilterKeys on and off.
Right SHIFT for eight seconds Switch High Contrast on and off. Left ALT +left SHIFT +PRINT SCREEN Switch MouseKeys on and off. Left ALT +left SHIFT +NUM LOCK Switch StickyKeys on and off.
SHIFT five times Switch ToggleKeys on and off. NUM LOCK for five seconds
Suppose you want to lock the folder movies in d: which has the path D:\movies.In the same drive create a text file and typeren movies movies.{21EC2020-3AEA-1069-A2DD-08002B30309D}Now save this text file as loc.batCreate another text file and type in itren movies.{21EC2020-3AEA-1069-A2DD-08002B30309D} moviesNow save this text file as key.batNow you can see 2 batch files loc and key. Press loc and the folder games will change to control panel and you cannot view its contents. Press key and you will get back your original folder.try it out!!!!!!!
Remove Yahoo Ads If you install the newest Yahoo Messenger 7.5 + & Version 8you'll notice a very annoying animated ads at the bottom of the main window.To remove the Ads! Here is the Procedure!(1)Open Notepad,(2) Paste the following code on Notepad and save it as: somename.regCode: REGEDIT4[HKEY_CURRENT_USER\Software\Yahoo\pager\YUrl]"N2Phone Adurl"="*""Messenger Ad"="*""Address Book"="*""Change Room Banner"="*""Conf Adurl"="*""Chat Adurl"="*""Tutorials"="*""Messenger Help"="*""Voice General Help"="*""Finance Disclaimer"="*""Webcam Upload Ad"="*""Webcam Viewer Ad"="*""Webcam Viewer Ad Big"="*""Webcam Viewer Ad Medium"="*""News Alert Ad URL"="*"(3)Double click the file ( say: somename.reg )(4)Click YesIts Done!! No more ads will be there in the yahoo messenger Window!
Of course everyone of us is a Gmail fan as it gives us the flexible features which other email clients don’t. Gmail differs from other email clients like Yahoo Mail and Windows Live Mail in the sense that is very much easy to use, it is very much fast and it has a syndication feed (Oh Yes! you heard me right there). This is a feature of Gmail that other popular email clients don’t have and most of us are aware of it but don’t know how to use it and thats where I come to the rescue :DThe syndication feed of Gmail messages can be used to read your newest emails in your Gmail account inbox from outside your Gmail account or should I say using a third party Feed reader application. Follow these simple little steps to configure your Feed reader to fetch your latest email from your Gmail account inbox.1. Open your Feed aggregator/reader software2. Select the option “Subscribe/Add Feed” and enter the following URL in the fieldhttps://mail.google.com/mail/feed/atom3. Authenticate yourself using your Gmail username and passwordWoah! Thats it :D now your Feed reader will fetch email updates from your Google account automatically and you don’t need to sign in again and again to your Gmail account through your browser to read your mail.Keep in mind: Some feed readers make a feed “Public” by default so make sure you make this feed “Private” so that no one except you can read your mails :) Have fun
IMPROVE XP SHUTDOWN SPEED [b] IdeaThis tweak reduces the time XP waits before automatically closing any running programs when you give it the command to shutdown.Go to Start then select RunType 'Regedit' and click okFind 'HKEY_CURRENT_USER\Control Panel\Desktop\'Select 'WaitToKillAppTimeout'Right click and select 'Modify'Change the value to '1000'Click 'OK'Now select 'HungAppTimeout'Right click and select 'Modify'Change the value to '1000'Click 'OK'Now find 'HKEY_USERS\.DEFAULT\Control Panel\Desktop'Select 'WaitToKillAppTimeout'Right click and select 'Modify'Change the value to '1000'Click 'OK'Now find 'HKEY_LOCAL_MACHINE\System\CurrentControlSet\Control\'Select 'WaitToKillServiceTimeout'Right click and select 'Modify'Change the value to '1000'Click 'OK'

Requirements To Install BartPE::: USB Flash drive with at least 256 MB of storage capacity.:: The files from your Windows Installation CD-Rom.How It Works::: PE Builder, condenses the original setup data for Windows XP into a slender operating system that is ready to run from or a USB flash drive.:: This compact, portable version of Windows includes all the important system tools for dealing with a PC emergency.:: You can even add other programs to this collection, such as the media writing tool Nero Burning ROM or an anti-spyware package such as Ad-Aware SE Personal, during the installation process.Steps Involved::: Download the latest PE Builder version (self-installing package) and install it.Start PE Builder (pebuilder.exe) and insert Microsoft Windows XP installation/setup CD, it will condense the setup files into your pen drive.:: At the main PE Builder dialog, select the "Pen Drive" option. Hit the "build" button. PE Builder will now ask you to create a BartPE directory, answer with "yes".:: PE Builder will now start building BartPE. This will take a few minutes. You will see a lot of files getting copied and/or decompressed, into your pen drive. If the data verify was correct and there where no errors reported you can boot the Pen Drive.If you have any problems or questions about PE Builder just post a comment here or look in the links below.

These are the few simple steps involve in installing a linux on a pen drive :Requrirements: 64Mb or larger pen drive, HP USB format tool, USBDSL.ZIP.Steps Involved :-1. Format your pen drive using Fat or Fat32 options from HP USB fornat tool.2. Download the USBDSL.Zip, its a mini version of linux called dammn small linux.3. Extract the contents of USBDSL.Zip into your flash drive.4. Browse to your flash drive and click "Makeboot.exe".5. Follow the instructions on the screen.6. Reboot your computer and set your BIOS to boot from USB-HDD or USB-ZIP,also set the boot priority if necessary.Note:1.If your motherboard does not support USB boot feature you will not be able to boot linux from your pen drive,its time to upgrade your motherboard. >>2.The process has been tested by me from a WInXp system with .NetFramework , .Net Framework is required to run makeboot.exe application.
20 interesting facts about Google Laughing LaughingThis is not a trick; but its a useful information that i founded, and like it to share with you all.1. Google started in January, 1996 as a research project at Stanford University, by Ph.D. candidates Larry Page and Sergey Brin when they were 24 years old and 23 years old respectively.2. The prime reason the Google home page is so bare is due to the fact that the founders didn’t know HTML and just wanted a quick interface. In fact it was noted that the submit button was a long time coming and hitting the RETURN key was the only way to burst Google into life.3. Google is a mathematical term 1 followed by one hundred zeroes. The term was coined by Milton Sirotta, nephew of American mathematician Edward Kasne.4. Gmail was used internally for nearly 2 ears prior to launch to the public. They discovered there was approximately 6 types of email users, and Gmail has been designed to accommodate these 6.5. It consisted of over 450,000 servers, racked up in clusters located in data centers around the world.6. The Google search engine receives about a billion search requests per day.7. Google's index of web pages is the largest in the world, comprising of eight billions(2005) of web pages. Google searches this immense collection of web pages often in less than half a second.8. Google has a tradition of creating April Fool's Day jokes - such as Google MentalPlex, which allegedly featured the use of mental power to search the web. Some thought the announcement of Gmail in 2004 around April Fool's Day was a joke.9. Google receives daily search requests from all over the world, including Antarctica.10. Users can restrict their searches for content in 35 non-English languages. To date, no requests have been received from beyond the earth's orbit, but Google has a Klingon interface just in case.11. Google has a world-class staff of 9,378 full-time employees known as Googlers. The company headquarters is called the Googleplex located at Mountain View at 1600 Amphitheatre Parkway.12. Google translates billions of HTML web pages into a display format for WAP and i-mode phones and wireless handheld devices.13. "I feel lucky" is nearly never used. It was a comfort button which actually takes to the first web page returned by the search results.14. Google use the unique 20%/5% rules. That is ,if at least 20% of people use a feature, then it will be included. At least 5% of people need to use a particular search preference before it will make it into the 'Advanced Preferences'.15. Employees in Google are encouraged to use 20% of their time working on their own projects. That's why we have GMail,Google News and Orkut now.16. Google Groups comprises more than 845 million Usenet messages, which is the world's largest collection of messages or the equivalent of more than a terabyte of human conversation.17. The basis of Google's search technology is called PageRank™, and assigns an "importance" value to each page on the web and gives it a rank to determine how useful it is. However, that's not why it's called PageRank. It's actually named after Google co-founder Larry Page.18. Googlers are multifaceted. One operations manager, who keeps the Google network in good health is a former neurosurgeon. One software engineer is a former rocket scientist. And the company's chef formerly prepared meals for members of The Grateful Dead and funkmeister George Clinton.19.Google’s Orkut is very popular in Brazil and India. It was the brainchild of a Google engineer who was given free reign to run with it.20. In a 2006 report of the world's richest people, Forbes reported that Sergey Brin was #26 with a net worth of $12.9 billion, and Larry Page was #27 with a net worth of $12.8 billion
Catch A Hacker Tip 1: Hackers cover their tracks. Experienced hackers cover them more thorougly, but amateur hackers sometimes leave things behind. Don't expect them to leave any really big evidence behind; expect more of little things here and there you might find surprising. For example, if you're writing a term paper and a black hat hacker accidently saved it when he took a paragraph out- that's suspicious. Where did that paragraph go? Well, for one thing, now you know he was in that area. Check the folders surrounding the file- you might find something.Tip 2: Decipher between the type of hackers that are attacking you. Experienced hackers will have a more in depth look around when they penetrate your system. They won't touch much because they know that that won't add too much to their knowledge. But if you know a hacker's been in, and some files are messed with, and you have a log of someone guessing passwords to a file or something of that sort, its probably some newbie who's just starting out. These are the easiest hackers to catch. They usually get so caught up in thoughts like "I'm in!" that they forget the basics, such as work behind a proxy.My friend was setting up a webserver once. His first time too, and he wasn't to anxious to set up some good software to protect against hackers and viruses. He didn't put up one IDS, and before you know it, the obvious happened. But this time, a newbie had struck. The nice log files showed, bluntly across the screen, multiple instances of a foreign IP address that stood out. Some stupid newbie had tried to login as "uucp" on my friend's XP computer, with a password of "uucp." Well, that's great, but he also had tried the same user/pass combination three times, enough to get himself logged nicely. Even a semi-brainless user with some form of neurological system knows that uucp isn't a default XP account. Again, excitement toiled this hacker's brain, and maybe if he hadn't done that, along with a few other stupid things, he wouldn't have gotten caught. What other things did he do? Well, lets see. He opened 35 instances of MS-DOS. He tried to clean the printer's heads, and he edited a .gif in notepad. Then he uninstalled a few programs and installed some html editor, and replaced four files with the words "14P."He might as well have posted his phone number. In a few days, we had tracked him down to asuburban town in Ohio. We let him go, not pressing any charges, because he had done nothing really damaging and had provided me with an example of a moron for this guide.Tip 3: Don't go crazy if you lose data. Chances are, if it was that important, you would have backed it up anyway. Most hackers nowadays wish they were back in 1989 when they could use a Black Box and having a Rainbow Book actually meant something. Most hackers aren't black hat, they are white hat, and some even grey hat. But in the end, most hackers that are in systems aren't satisfied by looking around. From past experiences, I have concluded that many hackers like to remember where've they been. So, what do they do? They either press delete here and there, or copy some files onto their systems. Stupid hackers (yes, there are plenty of stupid hackers) send files to e-mail addresses. Some free email companies will give you the IP of a certain e-mail address's user if you can prove that user has been notoriously hacking you. But most of the time, by the time you get the e-mail id it's been unused for weeks if not months or years, and services like hotmail have already deleted it.Tip 4: Save information! Any information that you get from a log file (proxy server IP, things like "14P", e-mail addresses that things were sent to, etc.) should be saved to a floppy disk (they're not floppy anymore, I wish I could get out of the habit of calling them that) incase there's a next time. If you get another attack, from the same proxy, or with similar e-mail addresses (e.g: one says Blackjack 123@something.whatever and the other says Black_jack_45@something.znn.com ) you can make an assumption that these hackers are the same people. In that case, it would probably be worth the effort to resolve the IP using the proxy and do a traceroute. Pressing charges is recommended if this is a repeat offender.Tip 5: Don't be stupid. If you've been hacked, take security to the next level. Hackers do talk about people they've hacked and they do post IPs and e-mail addresses. Proof? Take a look at Defcon Conventions. I've never gone to one, but I've seen the photos. The "Wall of Shame"-type of boards I've seen have IPs and e-mail addresses written all over them in fat red, dry-erase ink. Don't be the one to go searching the Defcon website and find your e-mail address posted on the Wall of Shame board!Tip 6: Don't rely on luck. Chances are, sometime or another, you're going to be targeted for an attack. Here you can rely on luck. Maybe they'll forget? Maybe they don't know how to do it? If you think this way, a surprise is going to hit your face very hard. Another way you could stupidly rely on luck is by saying this: It's probably just a whitehat. On the contrary, my friend, it's probably just a blackhat. A blackhat with knowledge stored in his head, ready to be used as an ax. It's your data. You take the chance.
Download E-Books From Google Code:+("index of") +("/ebooks""/book") +(chmpdfziprar) +Topic of the bookTo Find a particular eBook fileTry this query:Code:allinurl: +(rarchmzippdftgz) TheTitle of the book
Computer Acronym Cool Cool Cool
ADSL - Asymmetric Digital Subscriber Line
AGP - Accelerated Graphics Port
ALI - Acer Labs, Incorporated
ALU - Arithmetic Logic Unit
AMD - Advanced Micro Devices
APC - American Power Conversion
ASCII - American Standard Code for Information Interchange
ASIC - Application Specific Integrated Circuit
ASPI - Advanced SCSI Programming Interface
AT - Advanced Technology
ATI - ATI Technologies Inc.
ATX - Advanced Technology Extended
--- B ---
BFG - BFG Technologies
BIOS - Basic Input Output System
BNC - Barrel Nut Connector
--- C ---
CAS - Column Address Signal
CD - Compact DiskCDR - Compact Disk Recorder
CDRW - Compact Disk Re-Writer
CD-ROM - Compact Disk - Read Only Memory
CFM - Cubic Feet per Minute (ft�/min)
CMOS - Complementary Metal Oxide Semiconductor
CPU - Central Processing Unit
CTX - CTX Technology Corporation (Commited to Excellence)
--- D ---
DDR - Double Data Rate
DDR-SDRAM - Double Data Rate - Synchronous Dynamic Random Access MemoryDFI - DFI Inc. (Design for Innovation)DIMM - Dual Inline Memory ModuleDRAM - Dynamic Random Access MemoryDPI - Dots Per InchDSL - See ASDLDVD - Digital Versatile DiscDVD-RAM - Digital Versatile Disk - Random Access Memory--- E ---ECC - Error Correction CodeECS - Elitegroup Computer SystemsEDO - Extended Data OutEEPROM - Electrically Erasable Programmable Read-Only MemoryEPROM - Erasable Programmable Read-Only MemoryEVGA - EVGA Corporation--- F ---FC-PGA - Flip Chip Pin Grid ArrayFDC - Floppy Disk ControllerFDD - Floppy Disk DriveFPS - Frame Per SecondFPU - Floating Point UnitFSAA - Full Screen Anti-AliasingFS - For SaleFSB - Front Side Bus--- G ---GB - GigabytesGBps - Gigabytes per second or Gigabits per secondGDI - Graphical Device InterfaceGHz - GigaHertz--- H ---HDD - Hard Disk DriveHIS - Hightech Information System LimitedHP - Hewlett-Packard Development CompanyHSF - Heatsink-Fan--- I ---IBM - International Business Machines CorporationIC - Integrated CircuitIDE - Integrated Drive ElectronicsIFS- Item for SaleIRQ - Interrupt RequestISA - Industry Standard ArchitectureISO - International Standards Organization--- J ---JBL - JBL (Jame B. Lansing) SpeakersJVC - JVC Company of America- K ---Kbps - Kilobits Per SecondKBps - KiloBytes per second--- L ---LG - LG ElectronicsLAN - Local Are NetworkLCD - Liquid Crystal DisplayLDT - Lightning Data TransportLED - Light Emitting Diode--- M ---MAC - Media Access ControlMB � MotherBoard or MegabyteMBps - Megabytes Per SecondMbps - Megabits Per Second or Megabits Per SecondMHz - MegaHertzMIPS - Million Instructions Per SecondMMX - Multi-Media ExtensionsMSI - Micro Star International--- N ---NAS - Network Attached StorageNAT - Network Address TranslationNEC - NEC CorporationNIC - Network Interface Card--- O ---OC - Overclock (Over Clock)OCZ - OCZ TechnologyOEM - Original Equipment Manufacturer--- P ---PC - Personal ComputerPCB - Printed Circuit BoardPCI - Peripheral Component InterconnectPDA - Personal Digital AssistantPCMCIA - Peripheral Component Microchannel Interconnect ArchitecturePGA - Professional Graphics ArrayPLD - Programmable Logic DevicePM - Private Message / Private MessagingPnP - Plug 'n PlayPNY - PNY TechnologyPOST - Power On Self TestPPPoA - Point-to-Point Protocol over ATMPPPoE - Point-to-Point Protocol over EthernetPQI - PQI CorporationPSU - Power Supply Unit--- R ---RAID - Redundant Array of Inexpensive DisksRAM - Random Access MemoryRAMDAC - Random Access Memory Digital Analog ConvertorRDRAM - Rambus Dynamic Random Access MemoryROM - Read Only MemoryRPM - Revolutions Per Minute--- S ---SASID - Self-scanned Amorphous Silicon Integrated DisplaySCA - SCSI Configured AutomaticallySCSI - Small Computer System InterfaceSDRAM - Synchronous Dynamic Random Access MemorySECC - Single Edge Contact ConnectorSODIMM - Small Outline Dual Inline Memory ModuleSPARC - Scalable Processor ArChitectureSOHO - Small Office Home OfficeSRAM - Static Random Access MemorySSE - Streaming SIMD ExtensionsSVGA - Super Video Graphics ArrayS/PDIF - Sony/Philips Digital Interface--- T ---TB - TerabytesTBps - Terabytes per secondTbps - Terabits per secondTDK - TDK ElectronicsTEC - Thermoelectric CoolerTPC - TipidPCTWAIN - Technology Without An Important Name--- U ---UART - Universal Asynchronous Receiver/TransmitterUSB - Universal Serial BusUTP - Unshieled Twisted Pair--- V ---VCD - Video CDVPN - Virtual Private Network--- W ---WAN - Wide Area NetworkWTB - Want to BuyWYSIWYG - What You See Is What You Get--- X ---XGA - Extended Graphics ArrayXFX - XFX Graphics, a Division of PineXMS - Extended Memory SpecificationXT - Extended Technology
Enabling Right Click On sites Lots of web sites have disabled the right click function of the mouse button... it's really, really annoying. This is done so that you don't steal (via right-click->save picture) their photos or images or any other goodies. Unfortunately, it disables ALL right-click functionality: copy, paste, open in new window.It's easy to change, assuming your using IE 6:Click "Tools"->"Internet Options"Click the "Security" tabClick "Custom Level"Scroll down to the "Scripting" sectionSet "Active Scripting" to "disable"Click "Ok" a couple of times.You'll probably want to turn this back to "enable" when your done... 'cause generally the javascript enhances a website.
Screenshot Of your Desktop 1. "Print Screen" (key on your key board)if you press that key, it will capture the contents on the screen as image.2. Open Paint (Start->Programs-> Accessories->Paint)3. Paste or Ctrl+V.4. Save the file.Enjoy...
Microsoft reserves 20% of your available bandwidth for their own purposes like Windows Updates and interrogating your PC etc. Don't you want to get it back for your self? Here is the trick how to get 100% of your available bandwidth.Increase internet speed To get it back:Click Start then Run and type "gpedit.msc" without quotes.This opens the "group policy editor" and go to: "Local Computer Policy"Then "Computer Configuration" Then "Administrative Templates" Then select "Network" then "QOS Packet Scheduler"After that select "Limit Reservable Bandwidth".Double click on Limit Reservable bandwidth. It will say it is not configured, but the truth is under the 'Explain' tab i.e.” By default, the Packet Scheduler limits the system to 20 percent of the bandwidth of a connection, but you can use this setting to override the default."So the trick is to ENABLE reservable bandwidth, then set it to ZERO. This will allow the system to reserve nothing, rather than the default 20%.
Lock Files By Win Rar and Win Zip If u wanna lock a file with a password ...u can do so using win rar..Almost all archives support giving password, including WinZip, 7-Zip and it's not something special with Win Rar.Bt Win Rar is more comfortable than any other.And if you are setting access like this, it is better you set the compression level to "Store", which will make the compression and decompression faster, since the main aim here is to set a password.1)Right click on the file for which u want the password to b put.2)Click on "Add to Archive".3)Then go to Advanced tab.4)Click on set password...choose new password.5)Click ok.6)A win rar file with ur filename will be created.7)Next u may delete the original file, as u have now compressed it with a password.Any1 trying to open the rar file wont be able to, unless he knows the password.So, no need of folder lock software.enjoy your privacy guys....
To rename your Recycle Bin to something more funny? Like dust bin, hungry bin, litter box etc. Just follow the simple steps and you will be able to change the name of your Recycle Bin.* Go to Start > Run and type regedit to open Registry Editor.* Now navigate to HKEY_CLASSES_ROOT/CLSID/{645FF040-5081-101B-9F08-00AA002F954E}.* Now select (Default) , right-click it and select Modify.* The current value would be Recycle Bin. Change it to whatever you want.I have renamed my Recycle Bin to Dust Bin :D . One more thing, make a backup of your registry before trying out any tricks. I won’t be responsible for any damage to your system

Boot your Computer Faster Many computers take a lot of time to boot (or start ).This is due to many reasons.Some slight changes can do wonders for your system:1. Press start->run then type msconfig and press enter.Go to the startup tab. Here you will see a list of startup items. These are all the programs that automatically start when you boot your PC. It is these that slow down the boot up process.So uncheck all the unwanted items like ms-office, messengers other utilities that u may not need at startup). Don't uncheck your antivirus software.Restart your Pc to and see for yourself, your pc will now boot faster....2. A great new feature in Microsoft Windows XP is the ability to do a boot defragment. This places all boot files next to each other on the disk to allow for faster booting. By default this option is enabled, but on some systems it is not, so below is the information on how to turn it on:Go to Start Menu and Click RunType in regedit then click okFind "HKEY_LOCAL_MACHINE\SOFTWARE\Microsoft\Dfrg\BootOpt imizeFunction"Select "Enable" from the list on the rightRight on it and select "Modify"Change the value to Y .Reboot your Pc and see the change yourself.3. SPEED UP BOOT BY DISABLING UNUSED PORTS.!!You may have tried many tweaks like modifying windows XP start-up applications, prefetches, unload DLLs method, etc. And yes those methods do work for me.I have just accidentally found out another way to give you an extra boost in windows XP's boot performance. This is done by disabling your unused devices inDevice Manager. for example, if you don't have input devices that are connected to one of your USB's or COM ports, disabling them will give you an extra performance boost in booting. Go to Control Panel -> System -> Hardware tab -> device manager Disable devices that you don't use for your PC and then restart.
Convert FAT- NTFSTo convert a FAT partition to NTFS, perform the following steps.Click Start, click Programs, and then click Command Prompt.In Windows XP, click Start, click Run, type cmd and then click OK.At the command prompt, type CONVERT [driveletter]: /FS:NTFS. Convert.exe will attempt to convert the partition to NTFS.NOTE:Although the chance of corruption or data loss during the conversion from FAT to NTFS is minimal, it is best to perform a full backup of the data on the drive that it is to be converted prior to executing the convert command.
Disable CD Autorun( WinXP PRO Only)
1) Click Start, Run and enter GPEDIT.MSC
2) Go to Computer Configuration, Administrative Templates, System.
3) Locate the entry for Turn autoplay off and modify it as you desire.
Speed Up Browsing When you connect to a web site your computer sends information back and forth. Some of this information deals with resolving the site name to an IP address, the stuff that TCP/IP really deals with, not words. This is DNS information and is used so that you will not need to ask for the site location each and every time you visit the site. Although Windows XP and Windows XP have a pretty efficient DNS cache, you can increase its overall performance by increasing its size. You can do this with the registry entries below:
Windows Registry Editor Version 5.00
[HKEY_LOCAL_MACHINE\SYSTEM\CurrentControlSet\Services\Dnscache\Parameters]"CacheHashTableBucketSize"=dword:00000001"CacheHashTableSize"=dword:00000180"MaxCacheEntryTtlLimit"=dword:0000fa00"MaxSOACacheEntryTtlLimit"=dword:0000012dMake a new text file and rename it to dnscache.reg. Then copy and paste the above into it and save it. Merge it into the registry.DISABLE INDEXING SERVICESIndexing Services is a small little program that uses large amounts of RAM and can often make a computer endlessly loud and noisy. This system process indexes and updates lists of all the files that are on your computer. It does this so that when you do a search for something on your computer, it will search faster by scanning the index lists. If you don't search your computer often, or even if you do search often, this system service is completely unnecessary.
To disable do the following:
1. Go to Start
2. Click Settings
3. Click Control Panel
4. Double-click Add/Remove Programs
5. Click the Add/Remove Window Components
6. Uncheck the Indexing services
7. Click Next
OPTIMISE DISPLAY SETTINGS
Windows XP can look sexy but displaying all the visual items can waste system resources.
To optimize:
1.Go to Start
2. Click Settings
3. Click Control Panel
4. Click System
5. Click Advanced tab
6. In the Performance tab click Settings
7. Leave only the following ticked:- Show shadows under menus- Show shadows under mouse pointer- Show translucent selection rectangle- Use drop shadows for icons labels on the desktop- Use visual styles on windows and buttonsSPEEDUP FOLDER BROWSINGYou may have noticed that everytime you open my computer to browse folders that there is a slight delay.
This is because Windows XP automatically searches for network files and printers everytime you open Windows Explorer.
To fix this and to increase browsing significantly:
1. Open My Computer
2. Click on Tools menu
3. Click on Folder Options
4. Click on the View tab.
5. Uncheck the Automatically search for network folders and printers check box
6. Click Apply
7. Click Ok
8. Reboot your computer
REMOVE THE DESKTOP PICTURE
desktop background consumes a fair amount of memory and can slow the loading time of your system. Removing it will improve performance.
1. Right click on Desktop and select Properties
2. Select the Desktop tab
3. In the Background window select None
4. Click Ok
DISABLE UNNECESSARY SERVICES
Because Windows XP has to be all things to all people it has many services running that take up system resources that you will never need. Below is a list of services that can be disabled on most machines:
AlerterClipbookComputer BrowserDistributed Link Tracking ClientFast User SwitchingHelp and Support - (If you use Windows Help and Support leave this enabled)Human Interface Access DevicesIndexing ServiceIPSEC ServicesMessengerNetmeeting Remote Desktop Sharing (disabled for extra security)Portable Media Serial NumberRemote Desktop Help Session Manager (disabled for extra security)Remote Procedure Call LocatorRemote Registry (disabled for extra security)Remote Registry ServiceSecondary LogonRouting & Remote Access (disabled for extra security)ServerSSDP Discovery Service - (Unplug n' Pray will disable this)TelnetTCP/IP NetBIOS HelperUpload ManagerUniversal Plug and Play Device HostWindows TimeWireless Zero Configuration (Do not disable if you use a wireless network)Workstation
To disable these services:
Go to Start and then Run and type "services.msc"
Doubleclick on the service you want to changeChange the startup type to 'Disable"
REMOVE ANNOYING DELETE CONFIRMATION MESSAGES
Although not strictly a performance tweak I love this fix as it makes my machine 'feel' faster.
I hate the annoying 'are you sure?' messages that XP displays, especially if I have to use a laptop touchpad to close them.
To remove these messages:
1. Right-click on the 'Recycle Bin' on the desktop and then click 'Properties'
2. Clear the 'Display Delete Confirmation Dialog' check box and click 'Ok'If you do accidently delete a file don't worry as all is not lost. Just go to your Recycle Bin and 'Restore' the file.
Create nameless files and folders in WindowsThis trick will allow you to create files and folders without any name.Just follow the following steps:1.Select any file or folder.2.Right click on it, press rename or simply press F2.3.Press and hold the alt key. While holding the Alt key, type numbers 0160 from the numpad.Note: Type the numbers 0160 from the numpad, that is, the numbers present on the right side of the keyboard. Don't type the numbers which are present on top of the character keys.4.Press Enter and the nameless file or folder will be created.Reason: The file or folder that seems nameless is actually named with a single space.But what if you want to create another nameless file or folder in the same directory ?For this you will have to rename the file with 2 spaces. Just follow these steps below:1.Select file, press F2.2.Hold alt key and type 0160 from the numpad.3.Release the alt key. Now without doing anything else, again hold alt key and press 0160.4.Press enter and you will have second nameless file in the same directory.5.Repeat step 3 to create as many nameless files or folders in the same directory
Speed up your computer using ReadyBoostIf your system is not acting as fast as you would like, get some additional memory with ReadyBoost.ReadyBoost takes advantage of the fact that flash memory offers lower seek times than the hard disk. The flash drive will be used as a storing location for virtual memory pages of 4KB each. hard drives are faster at reading large amounts of date, whilst a flash drive is faster with smaller amount of data, like the one cached by Windows.How to get additional memory with ReadyBoostConnect your USB flash drive. In the AutoPlay window that pops up, select Speed up my system. Your flash drive will be tested to determine if it meets the requirements. This is because not all of them are as fast as Vista needs them. If it passes the test, the Properties dialog box will be displayed. Specify that you want to Use this device and then choose the amount of space to be reserved for ReadyBoost. Windows will recommend you to use a certain amount of space, but it is up to you if you want to stick to that amount. The amount you will reserve for ReadyBoost cannot be used for storage.You should keep in mind that using ReadyBoost will not actually add RAM memory to your computer, it will only be used as a memory cache.
Insert Image In Your Yahoo Google Hotmail mail SignatureTo add a graphic to your email signature in Yahoo! Mail:
1. Access Yahoo! Mail wit Windows Internet Explorer.
2. Select Mail Options from the navigation bar.
3. Follow the Signature link.
4. If the HTML toolbar is not yet visible, click Color and Graphics.
5. Make sure View HTML Source is checked.
6. Insert the image using the HTML tag.To place an image at the left of your signature, insert'
7. Make sure the image is accessible on a web server and reasonably small in proportions (not higher than about 75 pixels).
8. Uncheck View HTML Source to test your signature.
9.Click Save.
Data Recovery from Hard Drive recovery from hard drive is in the first place the method or process of retrieving accidentally deleted or inaccessible Data from failed computer hard drives. This method has long been used and offered by many data recovery hard drive companies to help their customers in recovering lost data. And, being a promising technique, data recovery from hard drives is now gaining popularity throughout the world.There are several factors that cause data stored in computer hard drives to be inaccessible. These include a software problem, computer virus, mechanical or electrical malfunction or a deliberate human act. But of these factors, the truth remains that the real threat to hard drives are the people who operate them. As you may know, many of the computer users just ignore data recovery from hard drives. They tend to but other hard drives without first considering effective recovery options like the data recovery from hard drives. Much worse is that most of them tend to use the Fdisk or other hard drive utilities to repair the failed hard drives without knowing exactly what they are doing.Well, contrary to the common belief, data recovery from hard drives is not so easy and storing data on a hard drive is not a hundred percent safe. If you are told that data recovery from hard drive is easy and safe, that is not always the case. A number of data stored in computer hard drives are not always recoverable and the stored information is not always exactly safe.So in order to successfully perform data recovery from hard drive, everyone should first know and follow the rules of successful data recovery from hard drives. The most important rule in data recovery from hard drive is not to write anything more to the affected drive. Note that this data recovery from hard drive rule stands for any situation. However, if you have deleted the files or a partition by accident, creating a partition is not advisable. Data recovery from hard drive experts often suggest that it is necessary in case you have deleted a partition by accident to just leave it blank. And, when the deletion of files occur in the recycling bin that you later on recognize you need, it is better not to save anything to the drive.There is one explanation for that recommendation for a successful data recovery from hard drives, and that is the idea that hard drive does not actually erase data or partition. When you delete the files from the operating system, the files will just be labeled as having been deleted. And, when you save more files on the drive, the system will consider those files labeled as “having been deleted” as being empty space and gladly copy over them. It is in this situation that the chances of a successful data recovery from hard drive are less.So, when problems on data recovery from hard drive take place, the best thing to do in data recovery from hard drive is to ensure that no more data is written to the drive. The data can still be recovered with a little amount of effort to be exerted. After all, data recovery from hard drive is not easy as it may seem.
Its simpleStart -> Control Pannel -> Regional and LAnguage
option -> Customize (beside English US) -> Go to TIME tab ->
Change AM symbol and PM symbol from AM and PM to ur
name -> Apply -> Ok ...IS it changed ??? Might be not ...Now go
to time in taskbar and Double Click it to open "Date and time
property" ...Look place where time chnges in digital form i.e.
02:47:52 AM , click to arrow to cnage the AM or PM by
selecting and press arrow. It will Show ur name or name that
was entered by u, Apply -> OK
and be Ready to See ..........
Popular Posts
-
Now you can resume the files u want to download from mediafire.com . Mediafire provide you resume facility but when you shutdown your PC or ...
-
Make a folder in any drive. Click on Start>Run Type "cmd" and click OK. Type Your Drive where is your folder created and press ...
-
This HTML escape tool known as HTML parser or encoder provides you to place adsense code into your post.You can also use HTML or Java Scri...
-
Here is the trick to rename your start button in windows XP. You can rename the taskbar. Download
-
The steps below will add an extra DOT allias in your existing Email ID. Normally yahoo dont allow a dot-id as an profile. The new ID can be ...
-
Chances are over the cause of time you have used many email addresses to communicate with friends, such as those given by your school, colle...
-
ANSI.SYS Defines functions that change display graphics, control cursor movement, and reassign keys. APPEND Causes MS-DOS to look in other d...
-
Who Used Your PC In your Absence? What Did He Do? 1st you Should Go- Start > Run> Type- Eventvwr.msc And you can check who use...
-
Instructions: 1. Put that in the address bar and press enter. 2. Start editing the writing/pics whatever you want. 3. To get rid of it ju...
-
If you want to know that how to turn the pc on in 10 seconds (may vary) just follow the given steps. Right Click on the start button then pr...

